This tutorial assumes you already know what Two-Way Sync is and how to configure it. If not, please review the How Two-Way Sync Works tutorial first.
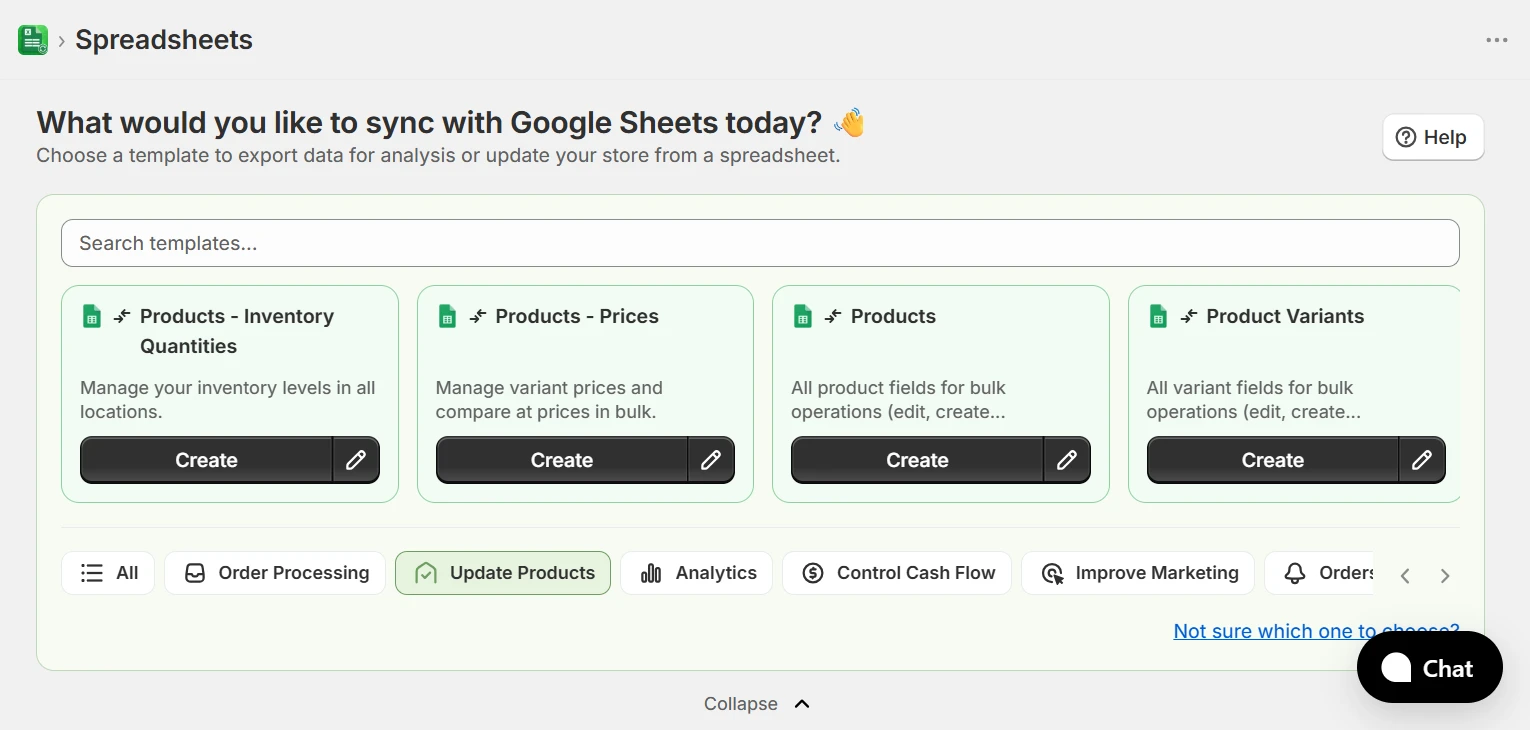
1. Choose the Product Variants template
From the home page, select the Update Products category in the template filter bar and click Create on the Product Variants template. If you are configuring a spreadsheet from scratch, click New Spreadsheet, select Two-Way Sync as the sync direction, and then choose the Product Variants template.
2. Add New Variants to an Existing Product
To create a new variant on an existing product, add a new row below the product group and leave Id (Variant) empty; this tells eCommix to create a new variant. The following fields are required:
- Handle (Product) — The handle of the product this variant belongs to (e.g.
my-product). - Id (Product) — The ID of the product this variant belongs to.
- Title (Product) — The title of the product (e.g. My Product).
- Option 1 Name (Variant) — The name of the option (e.g. Color, Size).
- Option 1 Value (Variant) — The value for that option on this variant (e.g. Red, Large, 500ml).
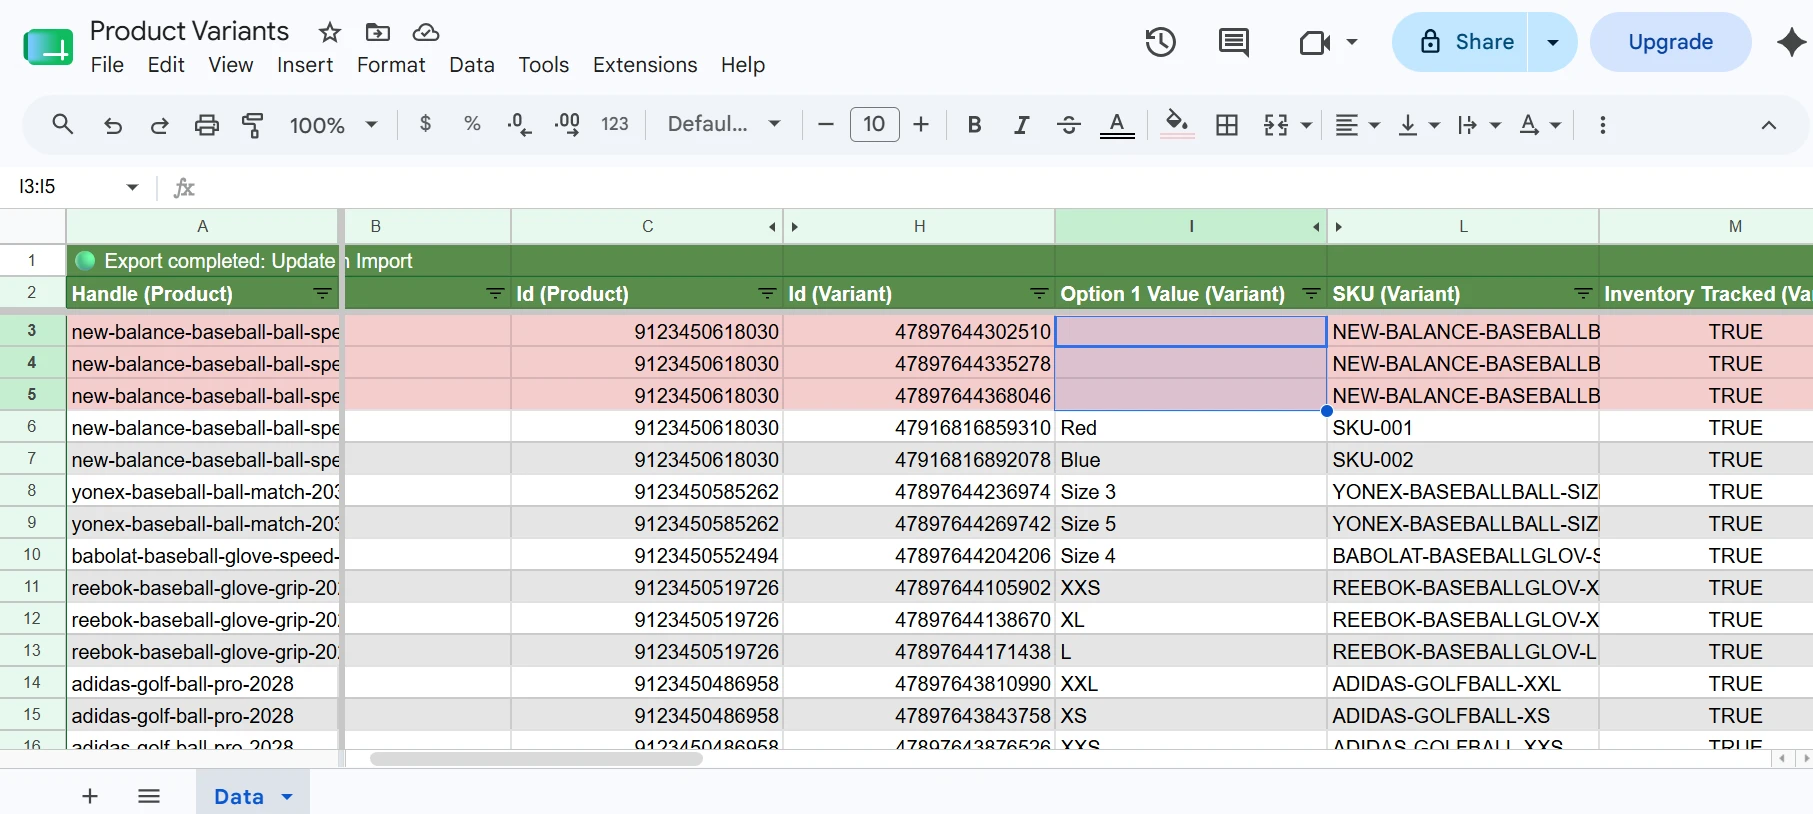
In this example, we are adding two variants with Option Value Red and Blue for Option Name Color:
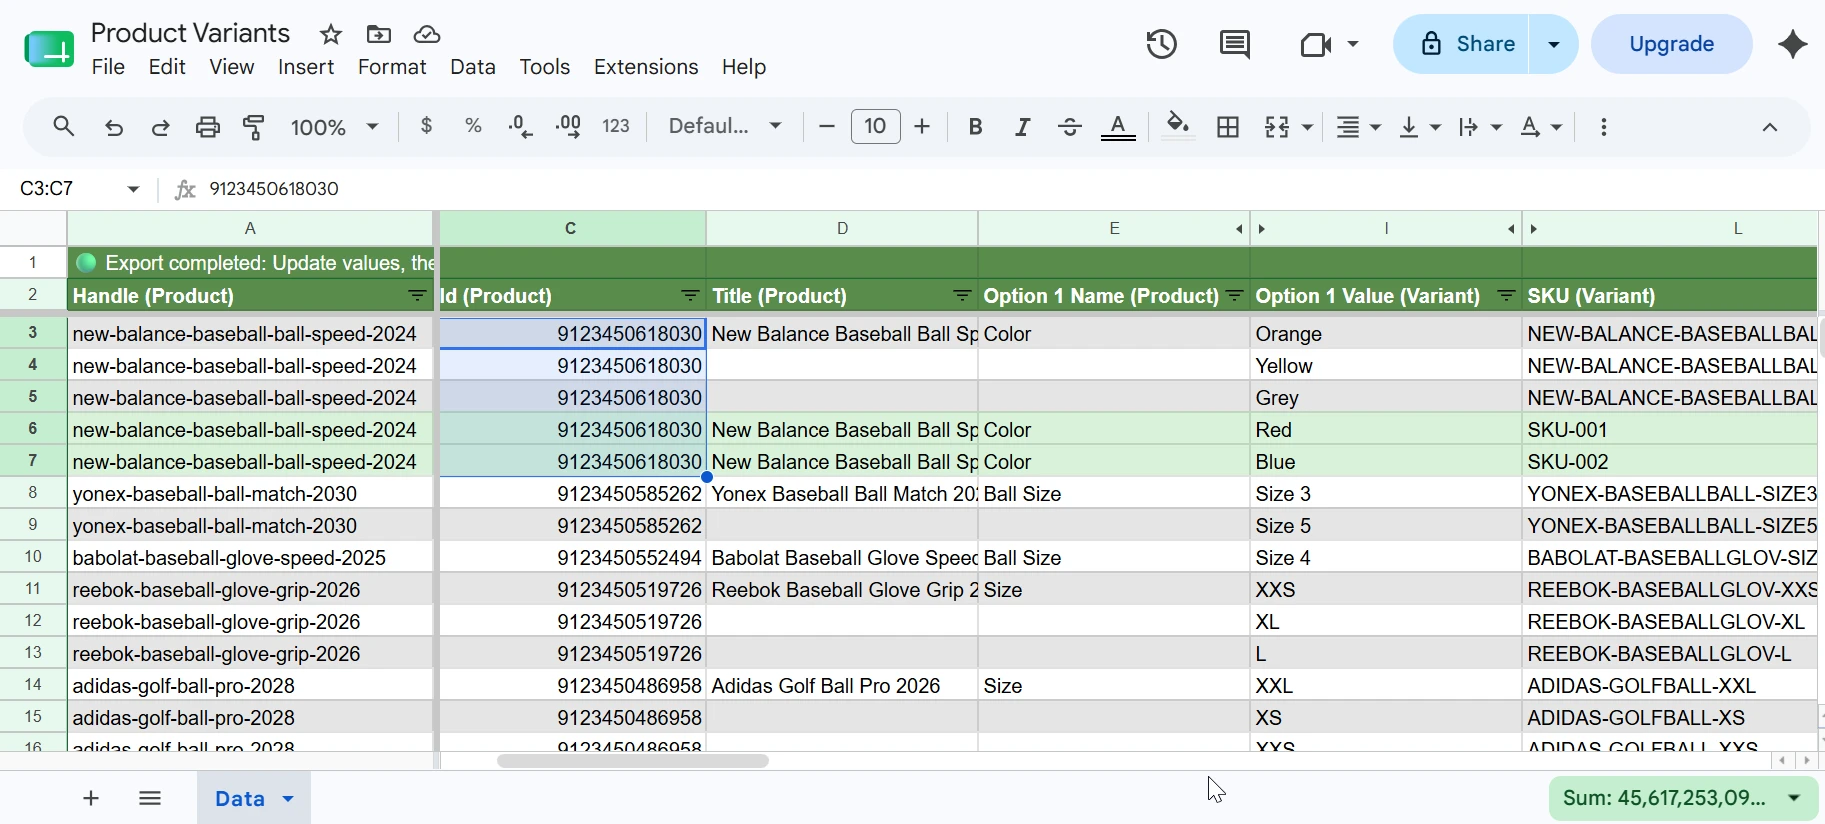
Notice that once the new variant rows are filled in, their background turns light green; this indicates they will be created as new variants on import. Once your rows are ready, go back to eCommix and click Sync to apply the changes. Not sure how? The How Two-Way Sync Works tutorial walks you through it.
You can also edit the spreadsheet configuration to include additional fields: SKU (Variant), Barcode (Variant), Price (Variant), Compare At Price (Variant), Cost Per Item (Variant), Weight Value (Variant) and Weight Unit (Variant) (these two must always be provided together), Inventory Policy (Variant) (DENY or CONTINUE), Requires Shipping (Variant), Taxable (Variant), Image (Variant), inventory level columns, catalog price columns, and variant metafield columns.
Feel free to hide columns you don't need or reorder them; for example, placing SKU (Variant) first instead of Handle (Product).
If you want to create a brand new product with variants instead, see the Creating Products from Google Sheets tutorial. To add images to your products, see Creating Product Images from Google Sheets.